Calibrate Oculus Quest 2 Controllers: Ensure Precision Play!
To calibrate Oculus Quest 2 controllers, open the Settings menu, select Devices, and then choose Configure Controllers. Follow the on-screen instructions to recalibrate your controllers successfully.
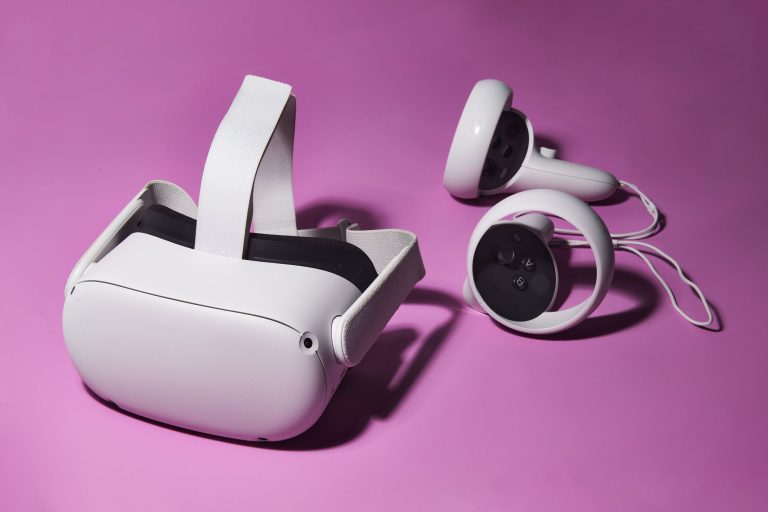
Calibrating your Oculus Quest 2 controllers ensures a precise and immersive VR experience. At times, controllers may drift or respond inaccurately, disrupting your gameplay or navigation. By calibrating them, you re-sync the controller’s movements with your in-game or virtual actions.
This process is essential for maintaining the accuracy and responsiveness that VR users have come to expect. With a few simple steps within the Oculus interface, you can quickly adjust your controllers, making sure that every movement is as seamless and intuitive as the virtual worlds you explore. Proper calibration not only enhances your gaming sessions but also helps in preventing motion sickness by aligning virtual and physical movements.
Calibrate Oculus Quest 2 Controllers: Ensure Precision Play!
Calibration is essential for an enhanced and accurate VR experience. Ensuring your Oculus Quest 2 controllers are properly calibrated can significantly improve gameplay precision, providing an immersive and seamless virtual environment. Calibration can compensate for drift, lag, or any inconsistencies that may arise over time.
Recognizing the need for calibration is key. Symptoms such as misaligned pointers, difficulty in selection or grabbing of virtual objects, or erratic controller movements might indicate that your controllers require attention. Users may also notice a decrease in tracking accuracy, where the controller doesn’t reflect real-world movements as closely as it should. Such signs should prompt users to calibrate their controllers for an optimal VR experience.
Getting Started With Calibration
To calibrate the Oculus Quest 2 controllers, creating a suitable play environment is crucial. Clear your play space of any obstacles and ensure you have adequate room to move freely. Illumination is also important; make sure the area is well-lit without direct sunlight affecting sensor accuracy.
Updating your Oculus Quest 2 software is a key step for successful calibration. Connect your device to Wi-Fi, open the settings menu, and select ‘System Update’ to install the latest firmware. Staying updated results in improved tracking and overall performance.
Becoming familiar with the Oculus Quest interface further smoothens the calibration process. Navigate through the menus and familiarize yourself with the location of the ‘Devices’ tab where the controller settings are located. This knowledge facilitates an efficient and swift calibration process.
Step-by-step Controller Calibration Process
Calibrating your Oculus Quest 2 controllers ensures an immersive and accurate VR experience. To begin, navigate to the Controller Settings Menu in your VR headset’s system settings. Once there, select the controller you wish to calibrate to initiate the calibration sequence.
During calibration, users are guided to fine-tune the controller responsiveness. This customization can be performed by adjusting the settings for better precision and comfort. Once adjustments are made, it is critical to test the calibration across various games to guarantee the controls respond as expected. This is essential for all VR experiences, from fast-paced action games to intricate simulations. Through diligent adjustment and testing, users achieve a more tailored and seamless interaction with the virtual environment.
Common Calibration Issues And Fixes
Addressing Drift in the Oculus Controllers often involves checking for firmware updates and ensuring your play area is clear of obstructions. Drift may also be caused by environmental factors such as reflections or other electronic devices. Precise recalibration might necessitate adjusting lighting conditions or cleaning the sensors on the controllers.
Troubleshooting Calibration Errors requires patience. Begin by restarting your device or re-pairing the controllers. Persistent issues might mean the need for a factory reset, but always try less intrusive fixes first to avoid data loss. Make sure the controller batteries are sufficiently charged, as low power may lead to calibration inconsistencies.
To Reset Calibration to Default Settings, navigate to the Oculus app on your mobile device, select your headset, and tap More Settings. Under Controller Settings, you’ll find the option to reset your controller calibration. Confirm the reset and follow the on-screen instructions to recalibrate your device.
Read More – How to Calibrate Oculus Quest 2 Controllers?: Effortless Guide
Enhancing Your Play With Accessory Options
Proper calibration of the Oculus Quest 2 controller enhances your virtual reality experience significantly. Ensuring your controllers are equipped with the right accessories is key. Players find controller grips and straps not only provide extra comfort but also improve grip for intense gameplay sessions, reducing the risk of accidental drops.
To avoid frequently purchasing new batteries, investing in high-quality rechargeable batteries is a wise choice. This eco-friendly option offers the convenience of recharging, ensuring you are always ready for your next VR adventure without any unexpected downtimes.
Regular maintenance of your controllers is essential for consistent performance. This includes keeping the sensors clean and checking for firmware updates, guaranteeing precise tracking and seamless interaction with the virtual environment.
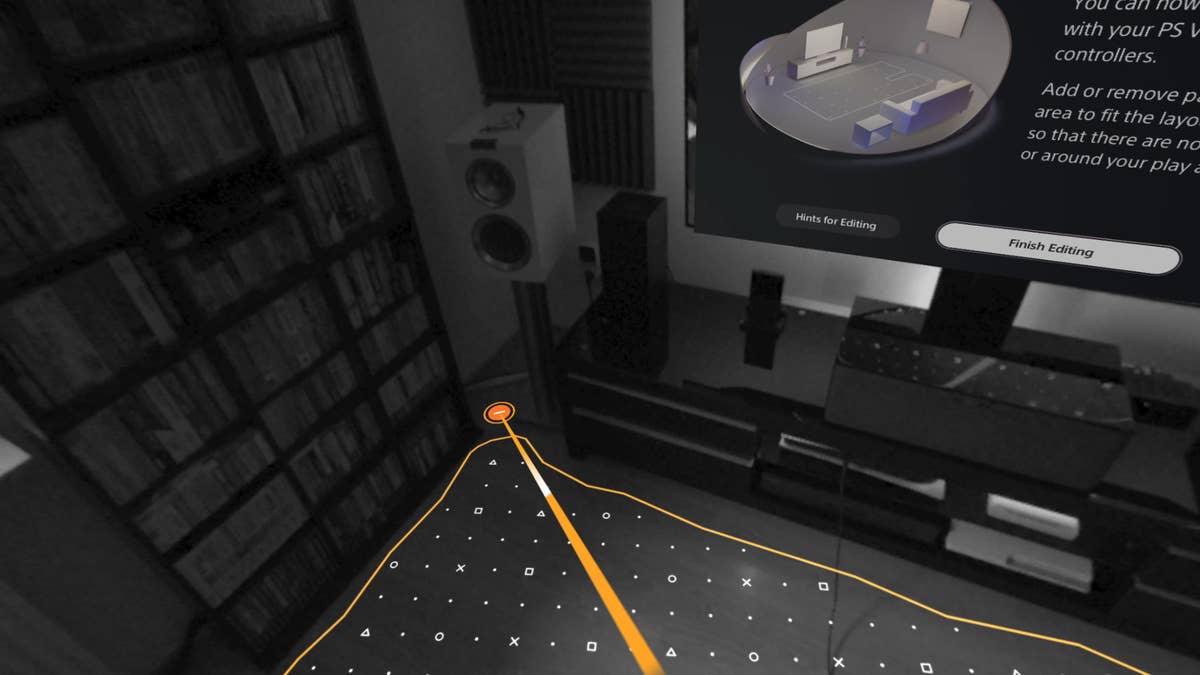
Credit: www.eurogamer.net
Maintaining Calibration For Optimal Gaming
Maintaining the calibration of Oculus Quest 2 controllers is crucial for an immersive gaming experience. Checking calibration accuracy regularly ensures that your interactions in the virtual environment remain precise and responsive. Users should be aware of how environmental factors such as lighting conditions and reflective surfaces might affect the tracking of their controllers.
Recalibrating your Oculus Quest 2 controllers might be necessary if you notice a decline in tracking accuracy or after changing your play area. This process aligns the virtual representation of the controllers with their actual physical location, thereby enhancing gameplay and interaction within the VR space. Follow the manufacturer’s guidance for the best recalibration results.
Frequently Asked Questions On Calibrate Oculus Quest 2 Controller?
How To Calibrate Oculus Quest 2 Controllers?
To calibrate your Oculus Quest 2 controllers, go to your headset’s settings menu. Select ‘Devices’, then ‘Controllers’. Here, you can access the calibration tool to adjust tracking and orientation. Follow on-screen instructions to ensure accuracy.
Can You Recalibrate Oculus Quest 2 Controllers?
Yes, recalibration is possible for Oculus Quest 2 controllers. Access this feature via the settings menu on your headset. Choose ‘Devices’, then ‘Controllers’ to find recalibration options. This can help improve tracking precision and controller response.
What To Do If Oculus Quest 2 Controller Drifts?
If your controller drifts, recalibrate it through the headset’s settings under ‘Devices’, then ‘Controllers’. If recalibration doesn’t help, check for updates or reset the controller by removing the battery for a few seconds.
Why Is My Oculus Quest 2 Controller Not Tracking?
Non-tracking issues may be caused by low battery, interference, or the need for recalibration. Check the controller’s battery level, ensure there are no signal obstructions or reflective surfaces around, and recalibrate via the headset’s settings if necessary.
Conclusion
Wrapping up, calibrating your Oculus Quest 2 controllers enhances your VR experience. By following the straightforward steps outlined, you’ll ensure precise and immersive gameplay. Remember, regular checks keep your system in top shape. Dive back into virtual worlds with confidence, and enjoy the seamless interaction that well-calibrated controllers provide.